|

It is starting to warm up, and the tournament season is just around the corner! So it is time for a little preventitive maintenance
on your rods and reels, to be sure they are in top notch shape when that tournament winning lunker strikes.
Depending on the amount of rods and reels you have this could take as little as 30 minutes, or as long as several days!
But cleaning and serviceing your equipment will keep them performing as they should, and will allow them to give you many
years of service without flaws!
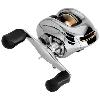
REELS:
Lets start with the reels! It is amazing how much grime and dirt will collect on your reels during a season! I like to
start by taking my reel apart (Be careful as you open it, There is springs, and gears that will fall out easily if your not
careful) I will take a can of compressed air, the kind you use for dusting off your computer keyboard, that is found at many
department stores. I will be sure to take out any loose springs that might fly across the room, and take the can of compressed
air and blow out any dust and debris that may have collected on the inside.
Once your satisfied with that, take a Q-tip and wipe any dirt that has collected on the gears and on the base of the reel.
Next take another clean Q-tip and use a good oil, designed for reels and outdoor equipment, and saturate the tip of the
Q-tip with the oil. Dab the oil soaked Q-tip on the moving parts, and all gears, making sure not to get to much oil on them.
This may sound funny! But to much oil will do nothing but collect extra dust and debris!
Next make sure you clean and oil the worm gear on the front of your reel! This is the area on the front that moves your
line back and forth as you reel in your line! This area collects alot of dirt and debris, and demands extra attention!
Next put your reel back toghether and wipe down the outside with a clean lint free cloth.
Check your reel to make sure it is working properly, and that everything is back in place as it should be! Don't be affraid
to get out your owners manual, and take a look at the exploded view of your reel, it will help you greatly if things did not
go back like they was before you broke your reel down.
RODS:
First look over you entire rod for any nicks or cracks that may have formed, paying special attention to your guide mounts,
and making sure there is no cracks in the epoxy coatings on the mounts, and check for loose guides.
Next take a clean Q-tip, and run it on the inside of all your line guide eyes, by doing this the cotton on the Q-tip will
pull off, and show you the location of any nicks, cracks, or bad places in the guide eye that will damage your fishing line,
and result in a lost fish! If a bad eye is found be sure to have it replaced by a good rodsmith.
After you are satisfied with the main rod body, and rod guides, be sure to check the reel seat for any damage, and to
make sure the threads on the reel seat is not damaged, and will tighten on to your reel nicely.
This is a project you can work on, on one of those rainy days. It only takes a few hours to do several rods and reels,
and will save you the heartache of a lost fish come tournament time!
|